Create a Note Book App using kotlin in Android Studio
In this article we will learn how to create a Note Book app in android Studio. Many Note Book app in the Google Play Store. If you need to create your own note book app then this article will help to create a Note Book app. To create a Note Book app we need to learn ListView, Custom Adapter, SQLite, Intent, Dialog. This article we will learn how to use custom adapter in List View, How to add, modify, delete data into a SQLite Database. We also learn how to use google provided android matrial dialog in our application. We will learn Step by Step.
Step 1: Setup Resource File
We need to setup our resource file because this resource file are use in our application. We need 5 resource file into our application. 4 icon and one drawable resource file are used to our design better look.
First we setup 4 icon just using our android default image assets. You can create this from Right click on “Drawable” => “New” => “Image Asset“. Then select Action Bar and Tab Icons as Icon Type and then click on Clip Art Icon, Then you see few icons.
- Type add into Search Box then see a icon name add select and name it ic_plus and change HOLO_DARK as Theme finaly click next->Finish..
- Type more into Search Box then see a icon name more vert select and name it ic_more_vert_white and change HOLO_DARK as Theme.
- Type archive into Search Box then see a icon name archive select and name it archive and change HOLO_LIGHT as Theme.
- Type star into Search Box then see a icon name star border select and name it fav_off.
Now our final task is create new drawable resource file. You can create this from Right click on “app” => “New” => “Android Resource file“. Then select Drawble as Resource type. I named it ripple_btn.xml. This activity also show a ripple effect when user click on it.
This is the code for our ripple_btn.xml file:
<?xml version="1.0" encoding="utf-8"?>
<ripple xmlns:android="http://schemas.android.com/apk/res/android"
    xmlns:tools="http://schemas.android.com/tools"
    android:color="#000000"
    tools:targetApi="lollipop">
    <item android:id="@android:id/mask">
        <shape android:shape="rectangle">
            <solid android:color="#000000" />
            <corners android:radius="0dp" />
        </shape>
    </item>
    <item android:id="@android:id/background">
        <shape android:shape="rectangle">
            <gradient
                android:angle="90"
                android:endColor="@color/colorAccent"
                android:startColor="@color/colorPrimary"
                android:type="linear" />
            <corners android:radius="26dp" />
        </shape>
    </item>
</ripple>
I am using external color for changing the Toolbar, Fab Button color. My color.xml file look like this.
<?xml version="1.0" encoding="utf-8"?>
<resources>
    <color name="colorPrimary">#262626</color>
    <color name="colorPrimaryDark">#000000</color>
    <color name="colorAccent">#757575</color>
</resources>
Also add some data in styles.xml file for changing the AlartDialog Button color. Here is my styles.xml file look like
<resources>
    <!-- Base application theme. -->
    <style name="AppTheme" parent="Theme.AppCompat.Light.DarkActionBar">
        <!-- Customize your theme here. -->
        <item name="colorPrimary">@color/colorPrimary</item>
        <item name="colorPrimaryDark">@color/colorPrimaryDark</item>
        <item name="colorAccent">@color/colorAccent</item>
        <item name="alertDialogTheme">@style/AlertDialogTheme</item>
    </style>

    <style name="AlertDialogTheme" parent="ThemeOverlay.AppCompat.Dialog.Alert">
        <item name="buttonBarNegativeButtonStyle">@style/NegativeButtonStyle</item>
        <item name="buttonBarNeutralButtonStyle">@style/NeutralButtonStyle</item>
        <item name="buttonBarPositiveButtonStyle">@style/PositiveButtonStyle</item>
    </style>

    <style name="NeutralButtonStyle" parent="Widget.AppCompat.Button.ButtonBar.AlertDialog">
        <item name="android:textColor">#f00</item>
    </style>

    <style name="NegativeButtonStyle" parent="Widget.AppCompat.Button.ButtonBar.AlertDialog">
        <item name="android:textColor">#999</item>
    </style>

    <style name="PositiveButtonStyle" parent="Widget.AppCompat.Button.ButtonBar.AlertDialog">
        <item name="android:textColor">#000</item>
    </style>

</resources>
Step 2: Building the user interface
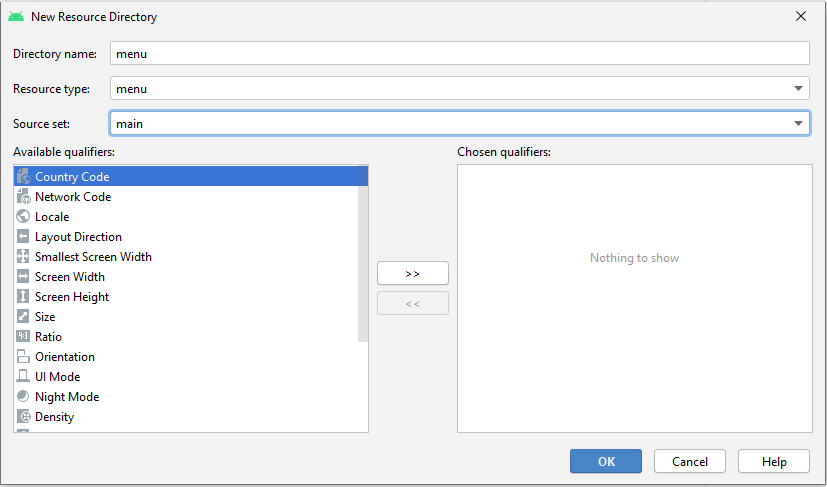
First we create a menu that will show the right side into the Toolbar. To create menu first we create a directory under res directory name menu. Right click on res then res->new->Android Resource Directory then select Resource Type as menu finally click ok.
Then create a menu resource file name menu.xml. Right click on menu then menu->new->Menu Resource Directory then select Resource Type as menu finally click ok . Copy and paste the given bellow code into this create menu.xml file.
<?xml version="1.0" encoding="utf-8"?>
<menu xmlns:android="http://schemas.android.com/apk/res/android"
    xmlns:app="http://schemas.android.com/apk/res-auto">
    <item
        android:id="@+id/overflowMenu"
        android:icon="@drawable/ic_more_vert_white"
        android:title=""
        app:showAsAction="always">
        <menu>
            <item
                android:id="@+id/archive"
                android:icon="@drawable/archive"
                android:orderInCategory="100"
                android:title="Archive" />
        </menu>
    </item>
</menu>
Now we edit our activity_main.xml, In this activity we need a ListView, a Floating Action Button to add new Note Book Data and a Menu into the Toolbar. If we add Floating Action Button we need to add a gradle in build.gradle file.
dependencies {
    implementation fileTree(dir: 'libs', include: ['*.jar'])
	...
        ...
	...

    implementation 'com.google.android.material:material:1.0.0'
}
activity_main.xml look like this
<?xml version="1.0" encoding="utf-8"?>
<androidx.coordinatorlayout.widget.CoordinatorLayout xmlns:tools="http://schemas.android.com/tools"
    android:layout_width="match_parent"
    android:layout_height="match_parent"
    android:background="#f5f5f5"
    xmlns:android="http://schemas.android.com/apk/res/android"
    xmlns:app="http://schemas.android.com/apk/res-auto">

    <!-- Main content -->
    <RelativeLayout
        android:layout_width="match_parent"
        android:layout_height="match_parent"
        android:orientation="vertical">
        <ListView
            android:id="@+id/ListView"
            android:layout_width="fill_parent"
            android:layout_height="wrap_content"
            android:divider="@android:color/transparent"/>
        <TextView
            android:id="@+id/empty_text"
            android:layout_width="wrap_content"
            android:layout_height="wrap_content"
            android:layout_centerInParent="true"
            android:text="Empty"/>
    </RelativeLayout>
    <com.google.android.material.floatingactionbutton.FloatingActionButton
        android:id="@+id/add_button"
        android:layout_width="wrap_content"
        android:layout_height="wrap_content"
        android:layout_gravity="bottom|right"
        android:layout_margin="16dp"
        android:contentDescription="ADD"
        app:srcCompat="@drawable/ic_plus"
        tools:ignore="VectorDrawableCompat" />

</androidx.coordinatorlayout.widget.CoordinatorLayout>
Now we need to design how our ListView Item Look Like. Create a new layout resource file and name it activity_notebook_list_items.xml. Paste the bellow code into this activity.
<?xml version="1.0" encoding="utf-8"?>
<LinearLayout xmlns:app="http://schemas.android.com/apk/res-auto"
    xmlns:android="http://schemas.android.com/apk/res/android"
    android:orientation="vertical"
    android:layout_width="match_parent"
    android:layout_height="wrap_content"
    android:layout_margin="5dp"
    android:padding="5dp">
        <LinearLayout
            android:layout_width="match_parent"
            android:layout_height="100dp"
            android:orientation="vertical"
            android:weightSum="6">
            <TextView
                android:id="@+id/date"
                android:layout_width="fill_parent"
                android:layout_height="wrap_content"
                android:padding="5dp"
                android:gravity="left|center"
                android:text="Date"
                android:textSize="9dp"/>
            <View
                android:layout_width="match_parent"
                android:layout_height="1px"
                android:background="#33000000"/>
            <LinearLayout
                android:layout_width="match_parent"
                android:layout_height="match_parent"
                android:orientation="horizontal">
                <LinearLayout
                    android:layout_width="0dp"
                    android:layout_height="match_parent"
                    android:gravity="center"
                    android:layout_weight="1">
                    <ImageView
                        android:id="@+id/fev"
                        android:layout_width="wrap_content"
                        android:layout_height="wrap_content"
                        android:scaleType="fitXY"
                        android:src="@drawable/fev_off" />
                </LinearLayout>
                <LinearLayout
                    android:layout_width="0dp"
                    android:layout_height="match_parent"
                    android:orientation="vertical"
                    android:layout_weight="5"
                    android:layout_marginLeft="5dp">
                    <TextView
                        android:id="@+id/title"
                        android:layout_width="match_parent"
                        android:layout_height="wrap_content"
                        android:layout_marginTop="5dp"
                        android:text="Title"
                        android:textStyle="bold"
                        android:textSize="16dp"
                        android:fontFamily="sans-serif-condensed-light"
                        android:textColor="#000000" />
                    <TextView
                        android:id="@+id/description"
                        android:layout_width="fill_parent"
                        android:layout_height="wrap_content"
                        android:layout_gravity="center"
                        android:text="Description"
                        android:textSize="12dp"
                        android:ellipsize="end"
                        android:maxLines="2"
                        android:textColor="#99000000" />
                </LinearLayout>
            </LinearLayout>
        </LinearLayout>
    <View
        android:layout_width="match_parent"
        android:layout_height="1px"
        android:background="#33000000"/>
</LinearLayout>
Now we need to create a layout resource file to use to add new Note Book data and name it activity_add_modify_notebook_data.xml . In this activity we need Two Edit Text to input Title and Description and also need a button to save the data into SQLite Database. This activity look like this,
<?xml version="1.0" encoding="utf-8"?>
<RelativeLayout xmlns:app="http://schemas.android.com/apk/res-auto"
    xmlns:android="http://schemas.android.com/apk/res/android"
    android:layout_width="match_parent"
    android:layout_height="match_parent"
    android:padding="10dp">
    <EditText
        android:id="@+id/title"
        android:layout_width="match_parent"
        android:layout_height="wrap_content"
        android:hint="Title"
        android:fontFamily="sans-serif-condensed-light"
        android:textStyle="bold"/>
    <EditText
        android:id="@+id/description"
        android:layout_width="match_parent"
        android:layout_height="wrap_content"
        android:layout_below="@+id/title"
        android:layout_marginTop="10dp"
        android:background="@android:color/transparent"
        android:hint="Description"
        android:textSize="16dp"/>
    <Button
        android:id="@+id/save_btn"
        android:layout_width="match_parent"
        android:layout_height="50dp"
        android:layout_alignParentBottom="true"
        android:text="ADD"
        android:textColor="@android:color/white"
        android:background="@drawable/ripple_btn"/>
</RelativeLayout>
Now we create our last layout activity name activity_archived.xml. This activity help to show the archive list. Paste the bellow code into this activity,
<?xml version="1.0" encoding="utf-8"?>
<androidx.coordinatorlayout.widget.CoordinatorLayout xmlns:tools="http://schemas.android.com/tools"
    android:layout_width="match_parent"
    android:layout_height="match_parent"
    xmlns:android="http://schemas.android.com/apk/res/android"
    xmlns:app="http://schemas.android.com/apk/res-auto">

    <!-- Main content -->
    <RelativeLayout
        android:layout_width="match_parent"
        android:layout_height="match_parent"
        android:orientation="vertical">
        <ListView
            android:id="@+id/ListView"
            android:layout_width="fill_parent"
            android:layout_height="wrap_content"
            android:divider="@android:color/transparent"/>
        <TextView
            android:id="@+id/empty_text"
            android:layout_width="wrap_content"
            android:layout_height="wrap_content"
            android:layout_centerInParent="true"
            android:text="Empty"/>
    </RelativeLayout>
</androidx.coordinatorlayout.widget.CoordinatorLayout>
Step 3: Coding the Functionality
We need 5 java class to complete your Note Book application. One for Creating SQLite Database and all database related operation, One for our home page control and show out all notes data, One for control list view, One for add and modify Note Book data, Finally last one for control archive activity. We will create one by one.
- First we create our SQLite Controller Database class name DBHelper.kt. Copy and paste the given bellow code into this created DBHelper.kt class without changing package name. You can also be able to modify as you need.
package com.andrious.notebook

import android.content.ContentValues
import android.content.Context
import android.database.Cursor
import android.database.sqlite.SQLiteDatabase
import android.database.sqlite.SQLiteOpenHelper
import java.util.*

class DBHelper(context: Context?) :
    SQLiteOpenHelper(context, DATABASE_NAME, null, 1) {

    override fun onCreate(db: SQLiteDatabase) {
        // TODO Auto-generated method stub
        db.execSQL(
            "CREATE TABLE $TABLE_NAME(id INTEGER PRIMARY KEY, title TEXT, description TEXT, created_at DATETIME, fevourite INTEGER, status INTEGER)"
        )
    }

    override fun onUpgrade(
        db: SQLiteDatabase,
        oldVersion: Int,
        newVersion: Int
    ) {
        // TODO Auto-generated method stub
        db.execSQL("DROP TABLE IF EXISTS $TABLE_NAME")
        onCreate(db)
    }

    fun insertNoteBookData(
        title: String?,
        description: String?,
        created_at: String?
    ): Boolean {
        var date: Date
        val db = this.writableDatabase
        val contentValues = ContentValues()
        contentValues.put("title", title)
        contentValues.put("description", description)
        contentValues.put("created_at", created_at)
        contentValues.put("fevourite", 0)
        contentValues.put("status", 0)
        db.insert(TABLE_NAME, null, contentValues)
        return true
    }

    fun updateNoteBookData(
        id: String,
        title: String?,
        description: String?
    ): Boolean {
        val db = this.writableDatabase
        val contentValues = ContentValues()
        contentValues.put("title", title)
        contentValues.put("description", description)
        db.update(
            TABLE_NAME,
            contentValues,
            "id = ? ",
            arrayOf(id)
        )
        return true
    }

    fun deleteNoteBookData(id: String): Boolean {
        val db = this.writableDatabase
        db.delete(TABLE_NAME, "id = ? ", arrayOf(id))
        return true
    }

    fun updateNoteBookFev(id: String, fev: Int?): Boolean {
        val db = this.writableDatabase
        val contentValues = ContentValues()
        contentValues.put("fevourite", fev)
        db.update(
            TABLE_NAME,
            contentValues,
            "id = ? ",
            arrayOf(id)
        )
        return true
    }

    fun updateNoteBookStatus(id: String, status: Int?): Boolean {
        val db = this.writableDatabase
        val contentValues = ContentValues()
        contentValues.put("status", status)
        db.update(
            TABLE_NAME,
            contentValues,
            "id = ? ",
            arrayOf(id)
        )
        return true
    }

    val noteBookData: Cursor
        get() {
            val db = this.readableDatabase
            return db.rawQuery(
                "select * from $TABLE_NAME WHERE status = '0' order by id asc",
                null
            )
        }

    val archivedData: Cursor
        get() {
            val db = this.readableDatabase
            return db.rawQuery(
                "select * from $TABLE_NAME WHERE status = '1' order by id asc",
                null
            )
        }

    fun getSingleNoteBookData(id: String): Cursor {
        val db = this.readableDatabase
        return db.rawQuery(
            "select * from $TABLE_NAME WHERE id = '$id'",
            null
        )
    }

    companion object {
        const val DATABASE_NAME = "NoteBookDBHelper.db"
        const val TABLE_NAME = "notebook"
    }
}
2. Second we modify our home activity controller class name MainActivity.kt. Copy and paste the given bellow code into this MainActivity.kt class without changing package name.
package com.andrious.notebook

import android.content.Intent
import android.database.Cursor
import android.os.Bundle
import android.view.Menu
import android.view.MenuItem
import android.view.View
import android.widget.AdapterView.OnItemClickListener
import android.widget.ListView
import android.widget.TextView
import androidx.appcompat.app.AlertDialog
import androidx.appcompat.app.AppCompatActivity
import com.google.android.material.floatingactionbutton.FloatingActionButton
import java.util.*

class MainActivity : AppCompatActivity() {
    val mydb = DBHelper(this)
    var dataList =
        ArrayList<HashMap<String, String>>()
    var simpleList: ListView? = null
    var add_button: FloatingActionButton? = null
    var empty_text: TextView? = null
    override fun onCreate(savedInstanceState: Bundle?) {
        super.onCreate(savedInstanceState)
        setContentView(R.layout.activity_main)

        empty_text = findViewById<View>(R.id.empty_text) as TextView
        simpleList = findViewById<View>(R.id.ListView) as ListView
        simpleList!!.emptyView = empty_text
        add_button = findViewById(R.id.add_button)
        add_button!!.setOnClickListener(View.OnClickListener {
            val i = Intent(this, AddAndModifyNoteBookData::class.java)
            i.putExtra("action", "add")
            startActivity(i)
        })
    }

    override fun onCreateOptionsMenu(menu: Menu?): Boolean {
        val inflater = menuInflater
        inflater.inflate(R.menu.menu_options, menu)
        return true
    }

    override fun onOptionsItemSelected(item: MenuItem): Boolean {
        //respond to menu item selection
        return when (item.itemId) {
            R.id.archive -> {
                startActivity(Intent(this@MainActivity, ArchivedActivity::class.java))
                true
            }
            else -> super.onOptionsItemSelected(item)
        }
    }

    override fun onResume() {
        super.onResume()
        populateData()
    }

    fun populateData() {
        runOnUiThread { fetchDataFromDB() }
    }

    fun fetchDataFromDB() {
        dataList.clear()
        val cursor = mydb!!.noteBookData
        loadDataList(cursor, dataList)
    }

    fun loadDataList(
        cursor: Cursor?,
        List: ArrayList<HashMap<String, String>>
    ) {
        if (cursor != null) {
            cursor.moveToFirst()
            while (cursor.isAfterLast == false) {
                val mapData =
                    HashMap<String, String>()
                mapData["id"] = cursor.getString(0).toString()
                mapData["title"] = cursor.getString(1).toString()
                mapData["description"] = cursor.getString(2).toString()
                mapData["date"] = cursor.getString(3).toString()
                mapData["fevourite"] = cursor.getString(4).toString()
                mapData["status"] = cursor.getString(5).toString()
                List.add(mapData)
                cursor.moveToNext()
            }
            val adapter = ListNoteBookAdapter(this@MainActivity, List, mydb)
            simpleList!!.adapter = adapter
            simpleList!!.onItemClickListener =
                OnItemClickListener { parent, view, position, id ->
                    val builder =
                        AlertDialog.Builder(this@MainActivity)
                    builder.setTitle(List[+position]["title"])
                    builder.setMessage(List[+position]["description"])
                    builder.setNeutralButton(
                        "ARCHIVE"
                    ) { dialog, id ->
                        mydb!!.updateNoteBookStatus(List[+position]["id"]!!, 1)
                        populateData()
                    }
                    builder.setNegativeButton(
                        "EDIT"
                    ) { dialog, id ->
                        val i =
                            Intent(this@MainActivity, AddAndModifyNoteBookData::class.java)
                        i.putExtra("id", List[+position]["id"])
                        i.putExtra("title", List[+position]["title"])
                        i.putExtra("description", List[+position]["description"])
                        i.putExtra("action", "edit")
                        startActivity(i)
                    }
                    builder.setPositiveButton("CANCEL", null)
                    builder.show()
                }
        }
    }
}
3. 3. Third we create our custom adapter class name ListNoteBookAdapter.kt that will help to modify the List View Items. Copy and paste the given bellow code into this created ListNoteBookAdapter.kt class without changing package name.
package com.andrious.notebook

import android.content.Context
import android.view.LayoutInflater
import android.view.View
import android.view.ViewGroup
import android.widget.BaseAdapter
import android.widget.ImageView
import android.widget.TextView
import java.util.*

class ListNoteBookAdapter(
    private val context: Context,
    private val data: ArrayList<HashMap<String, String>>,
    private val database: DBHelper
) :
    BaseAdapter() {
    private val inflater: LayoutInflater = this.context.getSystemService(Context.LAYOUT_INFLATER_SERVICE) as LayoutInflater
    override fun getCount(): Int { return data.size }
    override fun getItem(position: Int): Int { return position }
    override fun getItemId(position: Int): Long { return position.toLong() }

    override fun getView(
        position: Int,
        convertView: View?,
        parent: ViewGroup
    ): View {
        var dataitem = data[position]

        val rowView = inflater.inflate(R.layout.activity_notebook_list_items, parent, false)
        rowView.findViewById<TextView>(R.id.title).text = dataitem.get("title")
        rowView.findViewById<TextView>(R.id.description).text = dataitem.get("description")
        rowView.findViewById<TextView>(R.id.date).text = dataitem.get("date")
        var fevourite = rowView.findViewById(R.id.fev) as ImageView

        var fevourite_data =  dataitem.get("fevourite")
        if (fevourite_data!!.trim().contentEquals("0")) {
            fevourite.setImageResource(R.drawable.fev_off)
        } else {
            fevourite.setImageResource(R.drawable.fev_on)
        }

        fevourite.setOnClickListener {
            val cursor = database.getSingleNoteBookData(dataitem.get("id")!!)
            cursor.moveToFirst()
            if (cursor.getString(4).toString().contentEquals("0")) {
                database.updateNoteBookFev(dataitem.get("id")!!, 1)
                fevourite.setImageResource(R.drawable.fev_on)
            } else {
                database.updateNoteBookFev(dataitem.get("id")!!, 0)
                fevourite.setImageResource(R.drawable.fev_off)
            }
        }

        rowView.tag = position
        return rowView
    }

}
4. Fourth we create our add and modify List View Data controller class name AddAndModifyNoteBookData.kt. Copy and paste the given bellow code into this created AddAndModifyNoteBookData.kt class without changing package name.
package com.andrious.notebook

import android.os.Bundle
import android.view.View
import android.widget.Button
import android.widget.TextView
import android.widget.Toast
import androidx.appcompat.app.AppCompatActivity
import java.text.SimpleDateFormat
import java.util.*

class AddAndModifyNoteBookData : AppCompatActivity() {
    val mydb = DBHelper(this)
    var title_data: String? = null
    var des_data: String? = null
    var i_action: String? = null
    var i_id: String? = null
    override fun onCreate(savedInstanceState: Bundle?) {
        super.onCreate(savedInstanceState)
        val i = intent
        i_action = i.getStringExtra("action").toString()
        if (i_action!!.trim().contentEquals("edit")) {
            supportActionBar!!.setTitle("Udpate")
        } else {
            supportActionBar!!.setTitle("Add New")
        }
        setContentView(R.layout.activity_add_modify_notebook_data)
        var title = findViewById(R.id.title) as TextView
        var description = findViewById(R.id.description) as TextView
        var save_btn = findViewById(R.id.save_btn) as Button
        if (i_action!!.trim().contentEquals("edit")) {
            i_id = i.getStringExtra("id")
            val i_title = i.getStringExtra("title")
            val i_des = i.getStringExtra("description")
            title!!.text  = i_title
            description!!.text = i_des
            save_btn!!.text = "SAVE"
        }
        save_btn.setOnClickListener(View.OnClickListener {
            title_data = title!!.text.toString()
            des_data = description!!.text.toString()
            if (i_action!!.trim { it <= ' ' }.contentEquals("edit") && title_data!!.length > 3) {
                if (title_data!!.trim { it <= ' ' }.length > 0) {
                    mydb!!.updateNoteBookData(i_id!!, title_data, des_data)
                    finish()
                } else {
                    Toast.makeText(
                        applicationContext,
                        "Title Field is empty !!!",
                        Toast.LENGTH_SHORT
                    ).show()
                }
            }
            if (i_action!!.trim { it <= ' ' }.contentEquals("add")) {
                val date =
                    SimpleDateFormat("dd/MM/yyyy", Locale.getDefault())
                        .format(Date())
                if (title_data!!.trim { it <= ' ' }.length > 0) {
                    mydb!!.insertNoteBookData(title_data, des_data, date.toString())
                    finish()
                } else {
                    Toast.makeText(
                        applicationContext,
                        "Title Field is empty !!!",
                        Toast.LENGTH_SHORT
                    ).show()
                }
            }
        })


        //mydb.insertNoteBookData(title_data, des_data, date.toString());
    }
}
5. Fifth we create our archive controller class name ArchivedActivity.kt. This activity will help to show our all archive data. Copy and paste the given bellow code into this created ArchivedActivity.kt class without changing package name.
package com.andrious.notebook

import android.database.Cursor
import android.os.Bundle
import android.view.View
import android.widget.AdapterView.OnItemClickListener
import android.widget.ListView
import android.widget.TextView
import androidx.appcompat.app.AlertDialog
import androidx.appcompat.app.AppCompatActivity
import java.util.*

class ArchivedActivity : AppCompatActivity() {
    val mydb = DBHelper(this)
    var dataList =
        ArrayList<HashMap<String, String>>()
    var simpleList: ListView? = null
    var empty_text: TextView? = null
    override fun onCreate(savedInstanceState: Bundle?) {
        super.onCreate(savedInstanceState)
        supportActionBar!!.title = "Archive"
        setContentView(R.layout.activity_archived)
        empty_text = findViewById<View>(R.id.empty_text) as TextView
        simpleList = findViewById<View>(R.id.ListView) as ListView
        simpleList!!.emptyView = empty_text
    }

    public override fun onResume() {
        super.onResume()
        populateData()
    }

    fun populateData() {
        runOnUiThread { fetchDataFromDB() }
    }

    fun fetchDataFromDB() {
        dataList.clear()
        val cursor = mydb!!.archivedData
        loadDataList(cursor, dataList)
    }

    fun loadDataList(
        cursor: Cursor?,
        List: ArrayList<HashMap<String, String>>
    ) {
        if (cursor != null) {
            cursor.moveToFirst()
            while (cursor.isAfterLast == false) {
                val mapData =
                    HashMap<String, String>()
                mapData["id"] = cursor.getString(0).toString()
                mapData["title"] = cursor.getString(1).toString()
                mapData["description"] = cursor.getString(2).toString()
                mapData["date"] = cursor.getString(3).toString()
                mapData["fevourite"] = cursor.getString(4).toString()
                mapData["status"] = cursor.getString(5).toString()
                List.add(mapData)
                cursor.moveToNext()
            }
            val adapter = ListNoteBookAdapter(this, List, mydb)
            simpleList!!.adapter = adapter
            simpleList!!.onItemClickListener =
                OnItemClickListener { parent, view, position, id ->
                    val builder =
                        AlertDialog.Builder(this@ArchivedActivity)
                    builder.setTitle(List[+position]["title"])
                    //builder.setMessage(List.get(+position).get("description"));
                    builder.setNeutralButton(
                        "DELETE"
                    ) { dialog, id ->
                        mydb!!.deleteNoteBookData(List[+position]["id"]!!)
                        populateData()
                    }
                    builder.setNegativeButton(
                        "MOVE TO LIST"
                    ) { dialog, id ->
                        mydb!!.updateNoteBookStatus(List[+position]["id"]!!, 0)
                        populateData()
                    }
                    builder.setPositiveButton("CANCEL", null)
                    builder.show()
                }
        }
    }
}
Finally add this created class into manifests file. Here is my AndroidManifest.xml file look like
<?xml version="1.0" encoding="utf-8"?>
<manifest xmlns:android="http://schemas.android.com/apk/res/android"
    package="com.andrious.notebook">

    <application
        android:allowBackup="true"
        android:icon="@mipmap/ic_launcher"
        android:label="@string/app_name"
        android:roundIcon="@mipmap/ic_launcher_round"
        android:supportsRtl="true"
        android:theme="@style/AppTheme">
        <activity android:name=".MainActivity">
            <intent-filter>
                <action android:name="android.intent.action.MAIN" />

                <category android:name="android.intent.category.LAUNCHER" />
            </intent-filter>
        </activity>
        <activity android:name=".AddAndModifyNoteBookData"/>
        <activity android:name=".ArchivedActivity"/>
    </application>

</manifest>
Our all task is done. Now run and enjoy the application.
Leave a Comment
(0 Comments)